Parts
This section covers some of the parts I have used on one or more quads.
Video Transmitters
ImmersionRC 5.8GHz 25mW Video Transmitter
The dip switches on the back were covered by the clear heat shrink so I used a craft knife to gently trim it away so I could change the switch settings when needed.
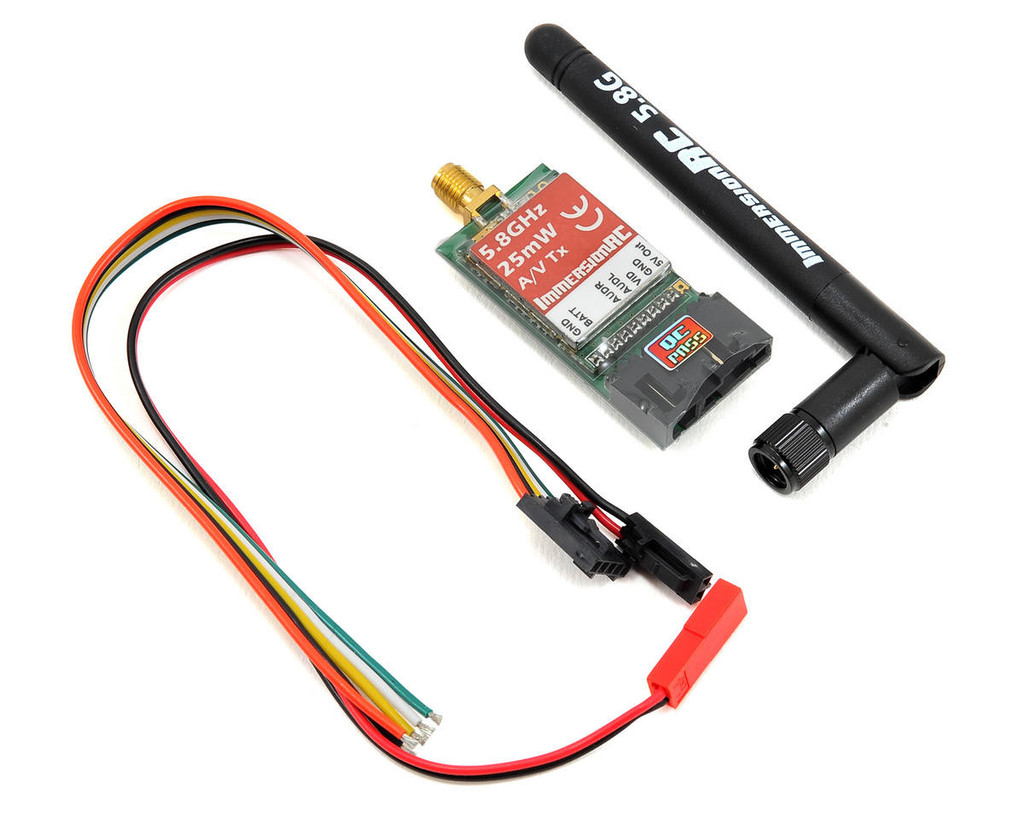
Switch 4 is unused on this 25mW unit. The dip switch channel mapping is as follows:
| Channel | Frequency (GHz) | 1 | 2 | 3 | 4 |
|---|---|---|---|---|---|
| 1 | 5.74 | On | On | On | X |
| 2 | 5.76 | Off | On | On | X |
| 3 | 5.78 | On | Off | On | X |
| 4 | 5.80 | Off | Off | On | X |
| 5 | 5.82 | On | On | Off | X |
| 6 | 5.84 | Off | On | Off | X |
| 7 | 5.86 | On | Off | Off | X |
Swapping the standard antenna for a SpiroNET style antenna makes this unit much more usable.
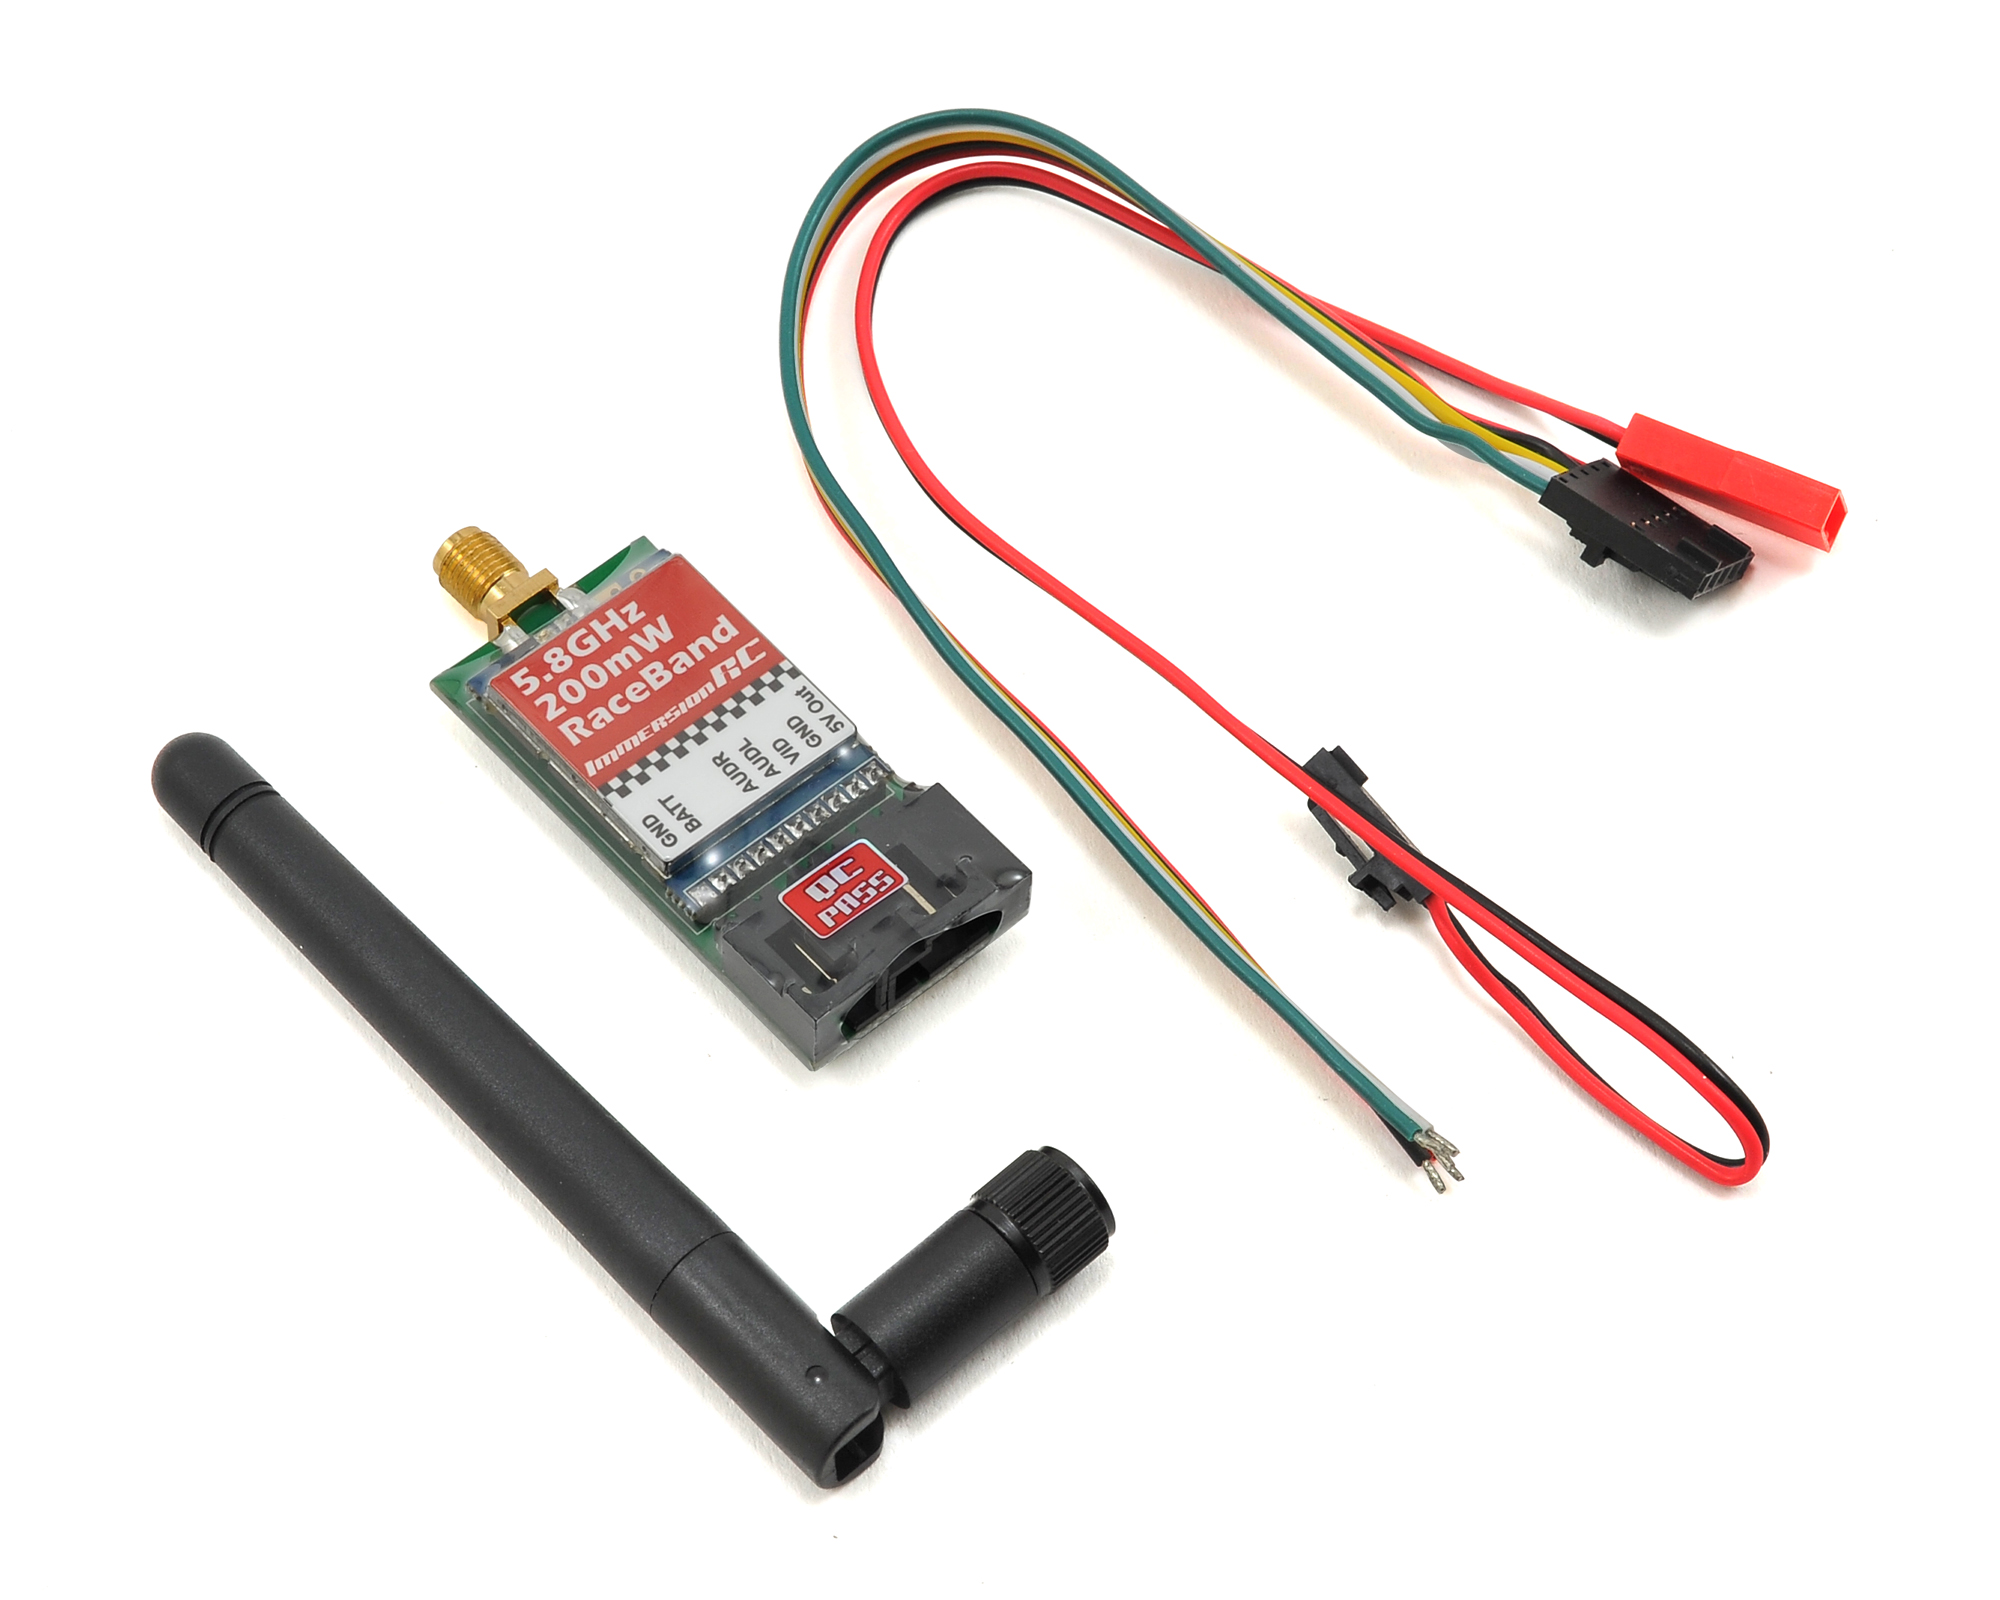
ImmersionRC 5.8GHz 200mW Video Transmitter
This unit provides the same IRC/FS channels as the 25mW unit plus another 8 channels called RaceBand. These channels are much more widely spaced.
IRC/FS
| Channel | Frequency (GHz) | 1 | 2 | 3 | 4 |
|---|---|---|---|---|---|
| 1 | 5.74 | On | On | On | Off |
| 2 | 5.76 | Off | On | On | Off |
| 3 | 5.78 | On | Off | On | Off |
| 4 | 5.80 | Off | Off | On | Off |
| 5 | 5.82 | On | On | Off | Off |
| 6 | 5.84 | Off | On | Off | Off |
| 7 | 5.86 | On | Off | Off | Off |
RaceBand
| Channel | Frequency (GHz) | 1 | 2 | 3 | 4 |
|---|---|---|---|---|---|
| 1 | 5.658 | On | On | On | On |
| 2 | 5.695 | Off | On | On | On |
| 3 | 5.732 | On | Off | On | On |
| 4 | 5.769 | Off | Off | On | On |
| 5 | 5.806 | On | On | Off | On |
| 6 | 5.843 | Off | On | Off | On |
| 7 | 5.880 | On | Off | Off | On |
| 8 | 5.917 | Off | Off | Off | On |
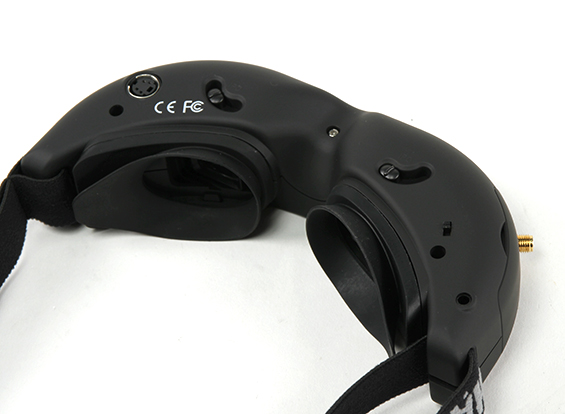
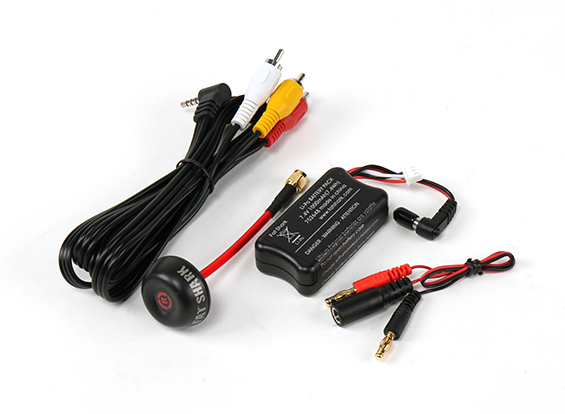
FatShark Attitude V3 FPV Goggles
These googles are light weight and for me where a slightly cheaper alternative to the more expensive Dominator variant.
The goggles support DC in from 7 to 13V (e.g. 2S or 3S bttery). They have little screens that support VGA 640 x 480 pixels and provide a FOV of 32 degrees diagonal. They support adjustable inter pupil distance (IPD). They have a built in head tracker (that I’ll never use) and are capable of showing a 3D video. They are compatible with the Fat Shark fan equipped faceplate too.

On the top left (above the antenna connector) of the goggles is the channel rocker switch. This switch can be rocked side to side to move sequentially through the available channels. An short audio beep is emitted when the channel changes. A long audio beep is emitted when the channel limit (top or bottom) has been reached. This rocker switch can also be pressed to reset the head tracker.
In the middle is the display control 4-way rocker switch. This is used to control the brightness and contrast: left and right increases and decreases the display contrast while forward and back increases and decreases the display brightness.
On the right hand side is the power input and a composite output connector for displaying the video/audio feed on a TV etc.

They come with the following:
- a 1000mAh 7.4V Lipo battery,
- a charging cable,
- a Spironet right hand polarised antenna,
- an AV cable,
- a 5.8GHz 32 channel modular receiver supporting ImmersionRC/Fatshark, A, E and Race bands.
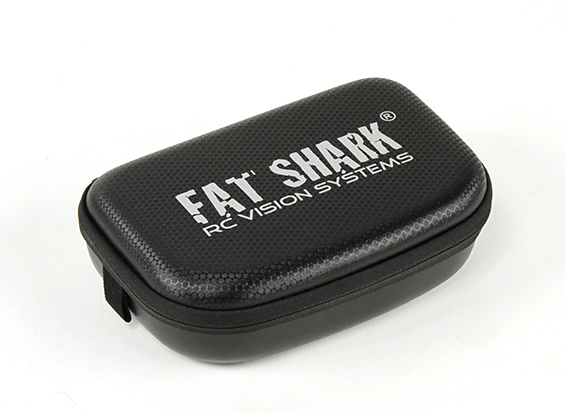
- a zipper carry case.
The goggles have a switch that allows the internal receiver to be turned off. This is convenient when using the goggles with an external receiver which feeds a video signal into the goggles via the
Using the dip switches on the receiver the various bands can be selected.
| Switch | Band | Name | CH1 | CH2 | CH3 | CH4 | CH5 | CH6 | CH7 | CH8 |
|---|---|---|---|---|---|---|---|---|---|---|
| 0-0 | 1 | Fat Shark/ImmersionRC | 5740 | 5760 | 5780 | 5800 | 5820 | 5840 | 5860 | 5880 |
| 0-1 | 2 | Band E (Boscam E) | 5705 | 5685 | 5665 | 5645 | 5885 | 5905 | 5925 | 5945 |
| 1-0 | 3 | Band A (Boscam A) | 5865 | 5845 | 5825 | 5805 | 5785 | 5765 | 5745 | 5725 |
| 1-1 | 4 | RaceBand | 5658 | 5695 | 5732 | 5769 | 5806 | 5843 | 5880 | 5917 |
I ended up purchasing the faceplate to replace the rubber eye-cups. This makes the goggles much more comfortable to wear.
FPV Cameras
Surveilzone HS1177 Sony Super HAD II 600TVL
The Sony HS1177 Super HAD II CCD 600TVL camera supports power from 5-22V and has a 2.8mm lens which provides approximately 130 degree field of view. It seems to have a good reputation in the FPV community.
The HS1177 FPV camera comes with a short On-Screen Display (OSD) controller cable with some connectors on the end. These connectors are common for security cameras and can be confusing for the lay-person from the quadcopter community.
I happened to have a BNC to RCA adapter laying around from an old security camera setup. This converts the video signal onto a connector style that I can more easily connect to other equipment such as a TV. I also had a reconfigurable wall-wart power adapter that had the appropriate barrel power connector.
The only modification I made to the camera was to set the Wide Dynamic Range setting to ON as this prevents very bright objects (such as clouds) from causing other areas (e.g. the ground) in the view from becoming very dark.
Exposure -> DWDR --> ON
Once the focus is set it can be useful to hot-glue the focus locking ring into place as the intense vibrations present at all times on the quadcopter can work it loose over time.
Eachine TX01
This is a 25mW 5.8GHz 40 channel FPV transmitter that I bought this unit as the camera for a Tiny Whoop setup.
A short press on the button cycles the currently selected band’s channels. A longer press (~2s) enters the band selector which cycles through the bands A, B, E, F, and Race. A long press (~5s) cycles between on (‘=’) and off (‘0’).
Once selected the settings are saved and retained.
| Band | Name | CH1 | CH2 | CH3 | CH4 | CH5 | CH6 | CH7 | CH8 |
|---|---|---|---|---|---|---|---|---|---|
| A | Band A | 5865 | 5845 | 5825 | 5805 | 5785 | 5765 | 5745 | 5725 |
| b | Band B | 5733 | 5752 | 5771 | 5790 | 5809 | 5828 | 5847 | 5866 |
| E | Band E | 5705 | 5685 | 5665 | 5645 | 5885 | 5905 | 5925 | 5945 |
| F | Band F (Fat Shark/IRC) | 5740 | 5760 | 5780 | 5800 | 5820 | 5840 | 5860 | 5880 |
| r | RaceBand | 5658 | 5695 | 5732 | 5769 | 5806 | 5843 | 5880 | 5917 |
Receivers
S603 Receiver
This receiver is a cheap alternative for a Spectrum branded receiver. These can be found on sites like banggood. I have ended up removing the receiver from its protective shell, remove all the pins, solder wires directly to the PPM pins and then wrap it in some clear heatshrink.
Bind Procedure
- Ensure transmitter is off.
- Insert bind plug into Bind port in S603.
- Power up the S603 using 5 - 8 Volts supply. I used the PPM input lead to my Naze32.
- The S603 should power up and the LED should be flashing.
- Remove the bind plug from the S603.
- Ensure that the throttle and Aux channel is set to desired failsafe position on the transmitter.
- Turn on transmitter while holding down the bind switch (on my DX6i this is the Trainer switch). Keep holding it until the S603 LED goes steady. For me it transitioned through flashing fast, off, slow flashing before finally going steady. Sometimes it takes a few tries before it is set properly. If it doesn’t end up with a steady LED then just repeat the procedure until it works.
- That’s it. Done.
On-Screen Displays
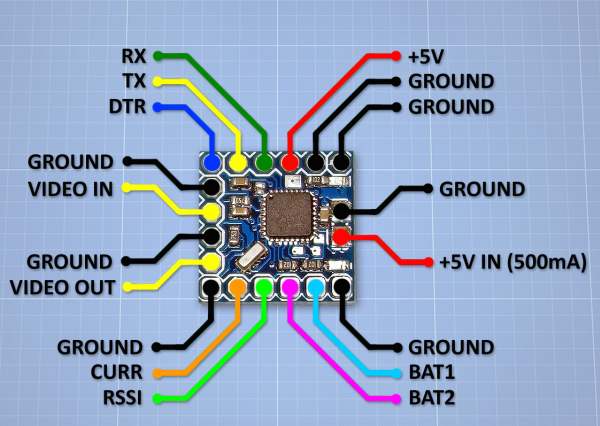
Micro Minim OSD
The Micro MinimOSD is pretty much the same as the MinimOSD only smaller. It has a 16x16mm size. It supports monitoring two batteries up each up to 4S size. It supports monitoring current too.
The information displayed by the OSD appears to be highly configurable though I am only planning on using it to overlay the battery voltage.
The board requires an external 5V supply. I can provide this from the 5V output on the ImmersionRC Video Transmitter that I am using.
I found a site showing how someone had used 90 degree header pins to reduce the overall volume required by the OSD when installed. This looks pretty good so I might just do the same thing. The pin out would end up looking something like this:
| 1 | 2 | 3 | 4 | 5 | 6 |
|---|---|---|---|---|---|
| GND | BAT1 | Cur | RSSI | Vi | Vo |
| GND | GND | 5V | RX | TX | DTR |
This layout provides the ability to access the FTDI pins to reconfigure the OSD and the most important (to me) sensor and video pins.
Action Cameras
Xiamoi Yi
The Xiamoi Yi is a cheap HD action camera similar to a GoPro. It provides a much cheaper option than a GoPro and hence can be put into harms way with less concern.
First step is to ensure you have the latest firmware running. Use this link.
A script exists to manipulate the camera to enable a feature like super view on a GoPro as well as increase the bit rate. Apparently the Yi’s sensor is 1600x1200. When it records in 1080 (16:9) resolution it simply crops the image from 1600 to 1080. This cropping results in the vertical field of view being reduced, which can be undesirable.The script enables the whole sensor to be used but also results in a 4:3 resolution. The Yi takes this 4:3 image and stretches it to fit the 16:9 1080 frame resolution. This results in some distortion.
Here is the script.
Propellors
5030 Gemfan
These are cheap flimsy propellors which were ideal while I was learning how to fly. They are pretty forgiving, in many crashes they did not break. I bought a pack of 20 from an eBay store.
5040 HQProp
These propellors feel better quality than the Gemfans. They feel firmer, less give. However, these propellors break very easily in a crash.
5046BN Gemfan
These propellors were great while they lasted. I had been using the Gemfan 5030 while learning to fly and once I started getting better I gave these a go. These propellors seemed a bit more responsive, perhaps because of their pitch and also they are thicker. They were surprisingly quiet.
5045 Triblade Gemfan
Electronic Speed Controllers
Afro 12A
This ESC’s use the SimonK bootloader and hence do not support the flight controller pass-through programming method to update the ESC firmware.
FVT LittleBee 20A
Batteries
Zippy 1800mAh 3S 40C
I bought these batteries for my ZMR250. I also use these on my Alien 5” too. They are rated as capable of 50C bursts.
Tunigy A-Spec 1300mAh 4S 60C
These are compact little batteries. I definitely feel the power difference capared to the 3S batteries I have. These batteries recommended charging at 1C was is really slow.
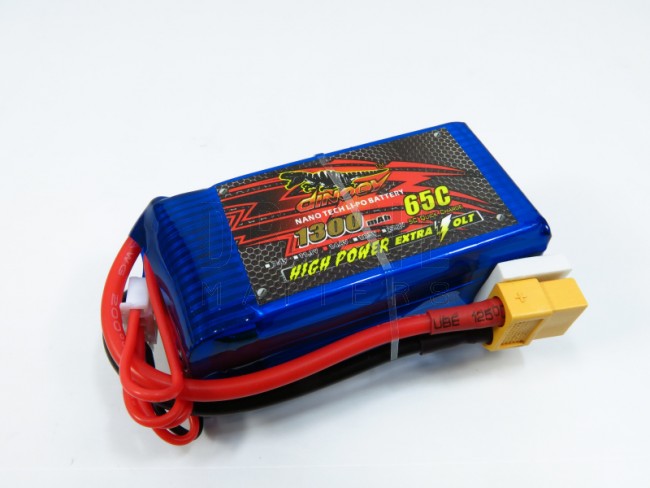
Dinogy 1300mAh 4S 65C
I bought these batteries from banggood.com. They are more compact than similarly specified batteries from other vendors. They support charge rates up to 5C which is convenient. However, on the back they recommend charge rates of 1C to 3C. Inconsistent.
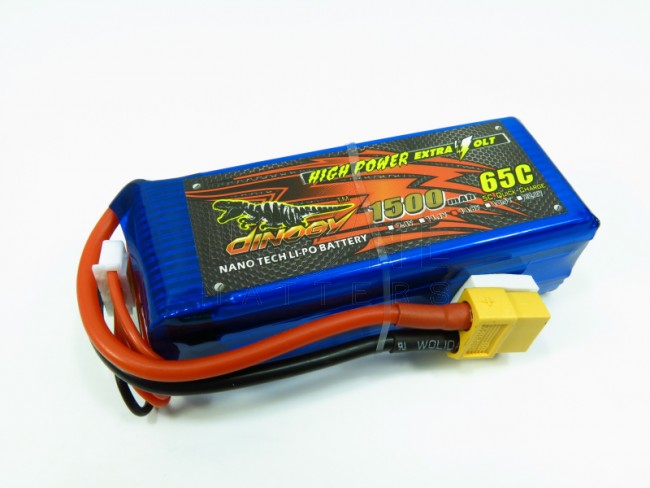
Dinogy 1500mAh 4S 65C
I bought these batteries from banggood.com. They are more compact than similarly specified batteries from other vendors. They support charge rates up to 5C which is convenient. However, on the back they recommend charge rates of 1C to 3C. Inconsistent.