Hardware
This section of the documentation covers how I installed the FC and the associated GPS receiver, LED status device and connected the Spektrum AR610 receiver that came with the Spektrum DX6i transmitter.
Flame Wheel F450
My F450 came with red and white motor struts. There was no instruction about which color should be used for the front and the rear and I didn’t find any common convention from some brief internet searches. I used the white struts for the two front motors and the red struts for the two rear motors.
Motors
The F450 is a QuadRotorX configuration and when coupled with the NAZA M the motor numbering is as follows:
2   1
 \ /
  X
 / \
3   4
The DJI propellors use a color coding to help identify which motor they should be used on. Propellors with a silver color at the centre are for the counter clockwise (CCW) motors and propellors with a black centre are for the clockwise (CW) motors.
| Motor | Direction | Prop Color |
|---|---|---|
| 1 | CCW | Silver |
| 2 | CW | Black |
| 3 | CCW | Silver |
| 4 | CW | Black |
Once the motors were connected to the ESC’s and mounted I tested their spin direction using a very flimsy piece of paper. By gently bringing the piece of paper to the spinning motor it will get pull to the spin direction.
If any of the motors are spinning in the wrong direction switch two of the ESC wires to alter the direction.
DJI NAZA-M LITE
The NAZA-M LITE provides the brains of the quadcopter. It comes as a set of discrete devices that are covered in more detail below.

FC
The Flight Controller (FC) is the brains of the flight system. The FC connects to the motor’s electronic speed controllers (ESC) and the remote control receiver.

The FC has a built-in Inertial Measurement Unit (IMU) that consists of one 3-axis accelerometer, one 3-axis gyroscope and a barometer for sensing the attitude and altitude.
The FC should be placed as close as possible to the center of the frame. The line on the top of the FC should be aligned with the center line of the craft and should be pointing to the nose. This will result in the motor ports facing the front of the craft.
The FC came with lots of 3M double sided tape strips which I used to stick it in place to the F450 base plate. I connected the motor wires before sticking the FC in place.
Connections
| NAZA FC | NAZA VU | NAZA LED | NAZA GPS | Spektrum AR610 |
|---|---|---|---|---|
| A | AILE | |||
| E | ELEV | |||
| T | THRO | |||
| R | RUDD | |||
| U | GEAR | |||
| X1 | ||||
| X2 | AUX1 | |||
| X3 | VU | |||
| LED | LED | |||
| EXP | GPS |
VU
The VU device monitors the battery Voltage and provides a regulated power feed to the FC.

The VU device can be connected to a variety of batteries from a 2S (7.2V) to a 6S (26.0V). I have a 2200mAh 3S battery.
The VU module connects to the X3 port on the FC.
GPS
The GPS/Compass module provides the FC with position and direction information.

The NAZA logo marked on the module should face the sky and the orientation arrow should point forward.
The GPS/Compass module came with a little carbon rod and two end pieces. I glued the end pieces to the carbon rod and stuck the GPS/Compass module to the top using a piece of 3M double sided tape. I then secured the base to one of the rear facing motor struts using the strut screws. This placed it towards the back of the craft close to the EXP port on the FC that it plugs in to. All the loose cable was secured with cable ties to make it tidy.
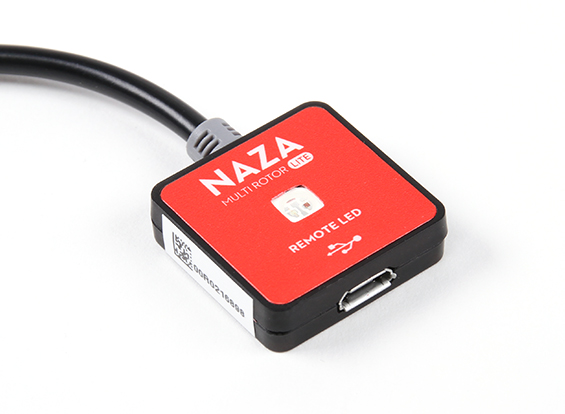
LED
The LED unit provide visual status while operating the quadcopter and the USB interface for connecting the FC to the NAZA Software Assistant program.
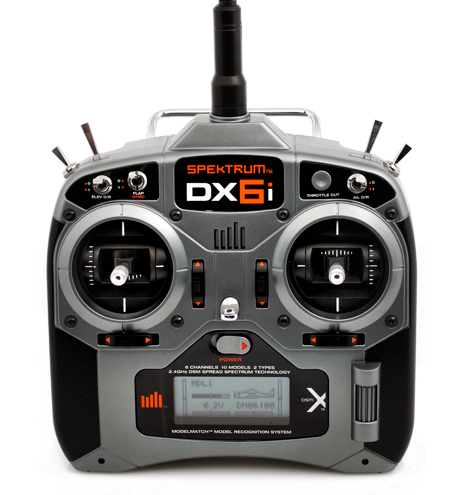
Spektrum AR610 Receiver
The DX6i came with a AR610 receiver so I’m using that on this quadcopter.

Binding
Follow the bind procedure detailed in the section Binding Receiver.
Now that the receiver is bound the actions on the transmitter will be relayed to the receiver and passed on to the FC. We can now start configuring the transmitter settings.
Battery Charger
I have purchased a Casal C66 battery charger. This takes a DC input anywhere from 11 - 30V. I can easily use this charger at home and, more importantly, I can take this charger along with a small 12V battery to the park so I can charge a battery while I’m flying with the other one.
I cut the end off the fly-lead and soldered on a EC3 connector matching my batteries.
It seems that the XT60 connector is the one primarily used in the quadcopter community so I’ll be using that on my next quadcopter.
Mini-S OSD
For FPV flying I bought the Mini-S OSD on eBay from gadgetextreme primarily so I could see the battery voltage while flying FPV. The OSD is covered in the On Screen Display (OSD) section of the FPV section.